Labels

Thursday, May 31, 2012

Love is in the Air LNS Challenge

This week's LNS challenge is to create a project for a wedding, anniversary or bridal shower.  For this challenge I decided to showcase the versatility of our great punches and dies, and below is the card that I created.  It was pretty simple to make again in thanks to our wonderful punches and dies!  I used the Vintage Wallpaper EF on a 3-3/4"x5" piece of Whisper White cardstock.  I used the Bird Builder punch to punch out 2 birds and wings and embossed them using the Vintage Wallpaper EF.  Using the new In-Color, Raspberry Ripple, I punched some branches out using the Bird Builder punch and a heart using the Hearts Collection Framelits.  I crumpled up the heart a bit to give it more of a textured look.  I stamped "For the Newlyweds" on a scrap piece of Whisper White cardstock and used the Bitty Banners Framelits to cut it out.  Added some pearls on the birds, the banner and the corners and I was done!  Hope you'll play along as well!  Here's a list of supplies:


Stamps: Teeny Tiny Wishes
Papers: Whisper White, Raspberry Ripple
Inks: Raspberry Ripple
Accessories: Big Shot, Vintage Wallpaper EF, Hearts Collection Framelits, Bitty Banners Framelits, Bird Builder Punch, Whisper White Satin Ribbon, Pearls, Dimensionals, Mini-Glue Dots

Saturday, May 26, 2012

Graduation Card

I made the following graduation card for a friend of mine who daughter graduated from high school.  It's pretty simple, but I do like how it turned out.  The school colors were obviously white, blue and gray.  Below is a list of what I used:


Stamps: Happy Grad
Inks: Pacific Point
Papers: Whisper White, Pacific Point, Basic Gray, Basic Gray DSP
Accessories: Big Shot, Perfect Polka Dot EF, Apothecary Accents Framelits, Scallop Trim Border Punch, Pool Party Baker's Twine, White Satin Ribbon, Pewter Brad, CAD, 1-1/4 Square Punch, 3/4" Circle Punch, Typing Paper (for the diploma), Mini Glue Dots, Dimensionals

Another Masculine LNS Challenge Card

I made another Father's Day card using the set, French Foliage.  I just got this set and am wondering why I didn't get it sooner!  This was a pretty simple and fast card to make.  I used the new In-Colors, Midnight Muse and Gumball Green, and added some Soft Suede in the mix.  After stamping the images, I distressed the edges with a distressing tool, and then sponged the edges with Soft Suede and a sponge.  I crinkled up the cardstock and then layered in a piece of Gumball Green.  I then tied some Early Espresso Baker's Twine around the front and attached the saying and a Natural Designer Button.  Here's a list of the rest of the items:


Stamps: French Foliage, Teeny Tiny Wishes
Inks: Midnight Muse, Gumball Green, Soft Suede
Papers: Whisper White, Soft Suede, Gumball Green
Accessories: Early Espresso Baker's Twine, Natural Designer Button, Modern Label Punch, Distressing Tool, Sponge, Dimensionals, Mini- Glue Dots

Thursday, May 24, 2012

Masculine LNS Challenge

Thanks for stopping by to check out this week's LNS challenge!  This week's challenge is to make a project with a masculine theme, and below is a Father's Day card that I made for my Father-in-Law.  I wanted to use the new In-Colors for my card, and choice to use Gumball Green and Midnight Muse.  Isn't the ribbon cool?  This is the new style Satin Ribbon in the upcoming Stampin' Up! catty, and you can start purchasing all the great new items on June 1st!

We would love to have you play along this week!  When you are done with your work of art, you can simply load your card in the member's file, which you can find HERE.  Need some inspiration?  You can find   the design team samples HERE.

Here's a list of what I used and my card for the challenge:


Stamps: Lovely as a Tree, Teeny Tiny Wishes
Papers: Whisper White, Midnight Muse
Inks: Gumball Green, Midnight Muse
Accessories: Regal Brads, Gumball Green Satin Ribbon, Vanilla Shimmer Smooch Spritz, Blender Pen, Paper Piercing Tool, Sponge, Typing Paper (to create the border)

Thursday, May 17, 2012

LNS Challenge

This week's LNS Challenge is to use our wonderful DSP in a project.  I thought I would do something other than a card and created a Welcome sign for my office, and used a 8" x 10" canvas for the base.  I used the Serif Essentials Alphabet Bigz Dies for the letters.  I used coasters for the base of the letters using the Alphabet dies, and then covered the letters with DSP cut using the same dies.  I created the flowers using the Blossom punch for the larger flower, and the 1-3/4" Scallop Circle Punch for the smaller one, and then sponged the edges with Riding Hood Red ink.  I then used the Beautiful Wings Embosslit Die and pearls for the butterfly accents.  I used the Blossom Petals Builder Punch for the leaves, folded them in half and then ran them through a crimper. Here's a list of what I used:


Stamps: None
Inks: Riding Hood Red
Papers:  Whisper White, Twitterpated DSP
Accessories: Big Shot, Serif Essentials Alphabet Bigz Dies, Beautiful Wings Embosslit Die, Blossom Petals Builder Punch, Blossom Punch, 1-3/4" Scallop Circle Punch, Pearls, Pretty in Pink Ribbon, White Brads, Mini-Glue Dots, Dimensionals, Paper Piercing Tool, Sponge, Crimper, Bone Folder, Glue Stick, Canvas, Coasters

Wednesday, May 16, 2012

Birthday Card

I needed to make a quick birthday card for a teacher that helps out during our lunch at school, and this is what I came up with.  I used the retired sets, Itty Bitty Background and Script, for the background on the card.  Added a little distressing and sponged the edges using Rich Razzleberry and Old Olive ink.  I made the bow using the great tutorial that Mary Brown has on her blog, and you can find it HERE.  The following is a list of what I used:


Stamp Sets: Field Flowers, Teeny Tiny Wishes, Script, Itty Bitty Backgrounds
Inks: Rich Razzleberry, Old Olive
Papers: Whisper White, Rich Razzleberry
Accessories: Antique Brad, Old Olive Satin Ribbon, Rich Razzleberry Ribbon, Heart Punch, Word Window Punch, Distressing Tool, Mini-Glue Dots, Dimensionals

Sunday, May 13, 2012

Happy Mother's Day

HAPPY MOTHER'S DAY MOM - I MISS YOU!


MYRTLE KAPUT
ENJOYING MOTHER'S DAY IN HEAVEN.......

AND HAPPY MOTHER'S DAY TO ALL YOU MOMS OUT THERE!

Thursday, May 10, 2012

LNS Challenge 172

This is my first week as a designer for the LateNightStampers Yahoo group, and I am so honored to be a part of this talented group of stampers!

This week's challenge is to create a card using one of your favorite retiring sets.  I chose to do a card using the set, Simply Soft, and I used my favorite retiring DSP, Beau Chateau.  I stamped the flower image using a black StazOn inkpad, and then watercolored the flowers in using Soft Suede and Marina Mist inks and my trusted watercolor brush.  It's kind of hard to see, but I put a high concentrate of Soft Suede ink on my brush and then "flicked" it on the Very Vanilla c/s.  I distressed the Very Vanilla c/s using a distressing tool, and then ripped and sponged the edges with Soft Suede.  I then crumbled up a piece of Soft Suede and layered in on my Very Vanilla card front.  I finally figured out how to make a bow by securing it with a brad, and you can see a great tutorial that shows you how: HERE.  I have to admit that I am very "attached" to my satin ribbon and love how it looks on cards.

Thanks for stopping by - I hope you play along with this week's challenge.  Once you have your work of art created, you can download it HERE.  Below is my card and a list of what I used:


Stamps: Simply Soft, Teeny Tiny Wishes
Inks: Soft Suede, Marina Mist, Black StazOn
Papers:  Very Vanilla, Soft Suede, Beau Chateau DSP
Accessories: Very Vanilla Satin Ribbon, Antique Brad, Distressing Tool, Watercolor Brush, Sponge, Dimensionals, Mini-Glue Dots

Wednesday, May 2, 2012

Challenge 171/SCS Creative Crew Challenge

Hey Everyone - thanks for stopping by!  I did another card that combines this week's LNS challenge (copy a Hallmark card) and this months SCS Creative Crew Challenge (May flowers).  Teacher's Appreciation Day is coming up and I made this card for one of the teacher's on my 5th grade lunch team.  I don't know what we would do without Mrs. Park; she is a great teacher!

This is the Hallmark card that I copied:


And below is my "interpretation" of the Hallmark card.  I did the emboss technique for my card.  After embossing the images on a piece of 4" x 5-1/4" piece of Whisper White c/s with Vanilla EP,  I then rubbed some Blushing Bride and Peach Parfait over the image using a sponge.  I then distressed the edges of both the Whisper White and Blushing Bride c/s using a distressing tool and also crumbled up just the top area of the Blushing Bride c/s.  Added some pearls, and there you have it!  Thanks for stopping by - hope you'll play along for both challenges!


Stamps: Simply Soft, Curvy Verses
Inks: Basic Black, Blushing Bride, Peach Parfait
Papers: Whisper White, Blushing Bride
Accessories: Heat Tool, Ivory Embossing Powder, Distressing Tool, Blushing Bride Pleated Ribbon, Pearls, Dimensionals

Tuesday, May 1, 2012

Creative Crew Challenge Card

I am so excited and honored to be a part of the SCS Stampin' Up! Creative Crew!  I hope you'll enjoy my projects and I am looking forward to seeing all of your creative works of art as well.

Baby Shower Sailboat Card

My first project is a baby card that I made for nephew and his wife, who are obviously expecting a baby boy.  The focus of this challenge was to use one of the In-Colors that we will miss the most.  I love Pear Pizzazz and love how it pairs easily with so many other colors.

For the body of the card I cut 1-1/2" down for the arms and 1" in.  I used a 1-3/8" Circle Punch for the opening at the top and at the bottom.   I then used a Scallop Punch for the accent pieces around the openings.  I used some Pear Pizzazz DSP for the sail boat and body of the card.  I punched one piece out using a 1-1/4" square punch and the other piece with a 1-3/8" square punch. I then cut each piece in half and used them for the sail.  I used a 1-3/8" circle for the base of the boat and cut about 1/4" off the top, and then wrapped some white baker's twine around it.  I think it turned out cute and hope you thinks so as well!  Here's the recipe:


Stamps: Pennant Parade
Inks: Pear Pizzazz
Papers: Whisper White, Pear Pizzazz, Pear Pizzazz DSP
Accessories:  1-3/8" Square Punch, 1-1/4" Square Punch, 1-3/8" Circle Punch, Dotted Scallop Ribbon Border Punch, Word Window Punch, 1/4" Circle Punch, Scallop Circle Punch, Mini-Glue Dots, Dimensionals, Scissors

Monochromatic Mother's Day Card

The second challenge was to make a card using flowers, and I decided to incorporate the flower theme into this monochromatic Mother's Day card that I made for my Mother-in-Law.  Since I didn't have any Poppy Parade ribbon, I used a 12" strand of the Whisper White Organza Ribbon and dyed it used a Poppy Parade Ink pad and a sponge.  I love our Whisper White Organza Ribbon just by itself and the fact that you can dye it to match whatever color theme you're using.  I used the Boho Blossom Punch for the flowers and added a Whisper White brad in the middle.  I got out my trusty ol' Singer sewing machine and added a sewed border.  Here's a list of what I used:


Stamps: Just Believe, Teeny Tiny Wishes (saying)
Inks: Poppy Parade
Papers: Whisper White, Poppy Parade
Accessories: Big Shot, Beautiful Wings Embosslits Die, Boho Blossom Punch, Word Window Punch, Whisper White Organza Ribbon, Whisper White Brads, Sponge, Dimensionals, Mini- Glue Dots, Scissors

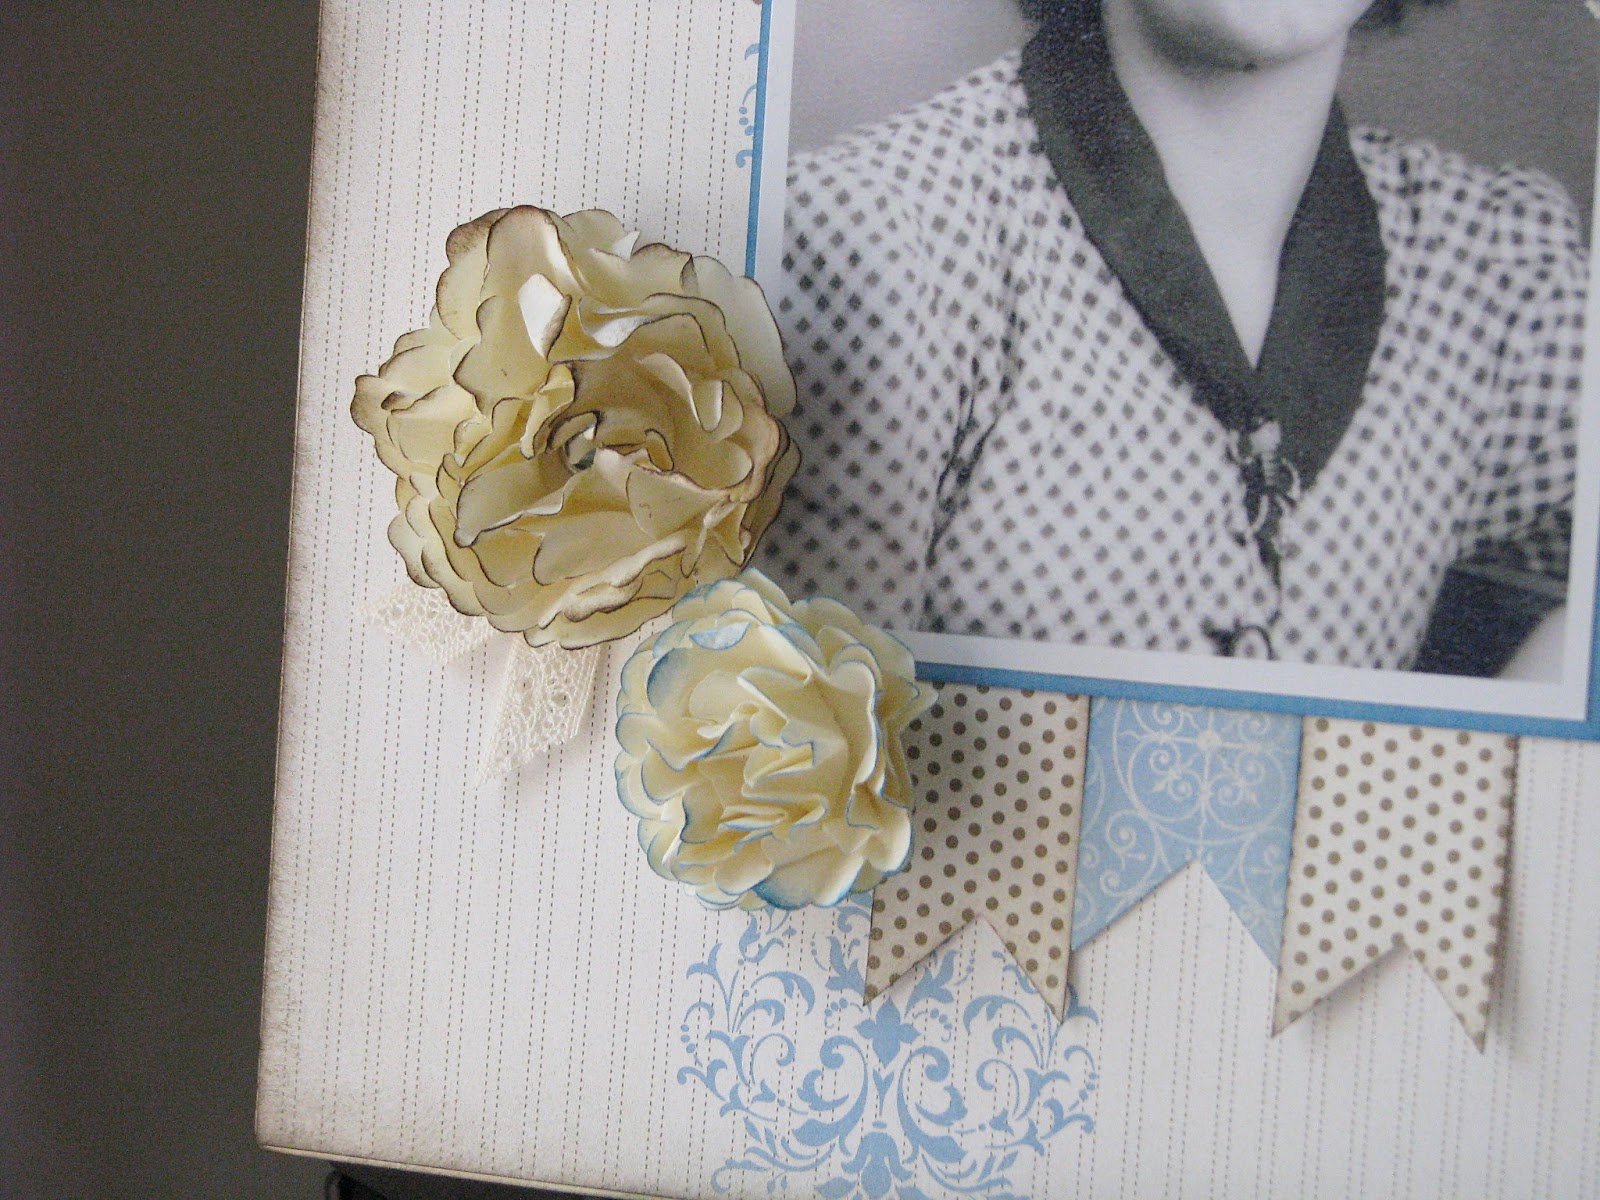
Mom Scrapbook Page

My next project is a scrapbook page that I made of my mom, and this is my favorite picture of her.  After I made this page I realized that I was suppose to use the in-colors.......oops!  I thought the Beau Chateau DSP worked the best with this picture and the softness of Soft Suede.  I loved, loved making the flowers for this page, and actually used the fab tutorial that Cathy Partlitsis has on her blog - which you can find HERE.  The flowers are so simply to make and I used the Blossom Punch for the large flowers, the 1-3/4" Scallop Circle Punch for the smaller 2 flowers, and the Boho Blossom Punch for the little ones.


Stamps: None
Inks: Soft Suede, Marina Mist
Papers: Soft Suede, Marina Mist, Very Vanilla, Beau Chateau DSP
Accessories: Big Shot, Serif Essentials Alphabet Dies, Paper Doily Sizzlits Die, Blossom Punch, 1-3/4" Scallop Circle Punch, Boho Blossom Punch, 1-1/4" Square Punch, Very Vanilla, Soft Suede and Marina Mist Brads, Chantilly 1/2" Crochet Trim Ribbon, Crimper, Paper Piercing Tool, Bone Folder, Scissors, Mini-Glue Dots, Dimensionals

Mother's Day Free Standing Pop-Up CArd

And here is my last project, which is a Free Standing Pop-Up card.  I have never made one of these babies before and it was quite simple.  Mary Jo Albright has a a great tutorial on SCS and you can find it HERE.  I went with a vintage look for this project and like how it turned out.  I think this would definitely made a fun stamp camp project!  Our new Simply Scored Scoring Tool made this card a breeze to score - I love the fact there are score lines every 1/8", and that the grooves are nice and deep so your stylus is less likely to slip out of them.  Here's the details on what I used:


Stamps: Field Flowers, Nature Walk (Bee), Teeny Tiny Wishes (saying)
Inks: Rich Razzleberry, Soft Suede, VersaMark IP
Papers: Very Vanilla, Rich Razzleberry, Crumb Cake
Accessories: Simply Scored Scoring Tool, Modern Label Punch, Bird Builder Punch, Rich Razzleberry Brad and Satin Ribbon, Copper Eylet, CAD, Distressing Tool, Paper Piercing Tool, Sponge, Scissors, Mini-Glue Dots, Dimensionals, Sticky Strip Tape

Monday, April 30, 2012

It's Been Sweet.........


Today is the last day to order from the Occasion Mini, and I thought I would try my hand at making a quick card for this week's LNS challenge and today's SCS CAS challenge using the Design Stickers, Sweet Shop.   I also used a lot of the product from the mini, and you can find those items listed below.  This week's LNS challenge is to copy a Hallmark card, and the CAS challenge was to use the colors chocolate, green and ivory/white - thought it would be fun to do a "combo" card for both of them.  This is the template from the LNS challenge:
And this is my card with the recipe listed below:


Stamps: Teeny Tiny Wishes
Inks: Soft Suede
Papers: Whisper White, Soft Suede, Sweet Shop DSP
Accessories: Big Shot, Labels Collection Framelits Dies, Adorning Accents Edgelits Dies, Adorning Accent EF, Small Oval Punch, Jelly Bean Brads, Whisper White Organza Ribbon, Sweet Shop Designer Stickers, Paper Piercing Tool, Dimensionals


Sunday, April 29, 2012

Pinterest LNS Cased Card


I made this card for this week's LNS Pinterest Case Challenge and for this month's SU Creative Crew Challenge (which was to show case one of the retiring In-Colors).  This card was cased from one that the incredibly talented Vicki Burdick did, and you can see her beautiful work of art: HERE.

I love how Poppy Parade and Sahara Sand go together, and I think that Sahara Sand helps to soften and tone down the Poppy Parade.  After I did the first card, I decided it needed a little something extra and added some accents using the soon to be retired Blossom Bouquet Triple Layer Punch.  I used the also soon to be retired Finial Press EF on the background of the card and then sewed a zig-zag line up the middles connecting the papers.  What do you think - with or without the accent?  I like it with - and here's a list of what I used.


Stamps: Bordering on Romance, Teeny Tiny Wishes
Inks: Black StazOn, Poppy Parade, Pear Pizzazz, Peach Parfait
Papers: Whisper White, Poppy Parade, Sahara Sand
Accessories: Big Shot, Finial Press EF, Boho Blossoms Punch, Blossom Bouquet Triple Layer Punch, Poppy Parade 1/2" Stitched-Poly Ribbon, Pearls, Watercolor Brush, Dimensionals, Scissors, Mini-Glue Dots, Sewing Machine/Thread

Saturday, April 28, 2012

Another Pinterest Challenge Card

I saw a beautiful card done on PI that has some beautiful flowers on it that were embossed and then colored in from the back.  For those of you who do not have a PI account, I found the card on SCS and you can see it HERE.

For my card, I started by embossing the large flower from the Fifth Avenue Floral set using a Versa Mark IP, Gold EP, and a heat tool.  I then colored in the back of the flowers with a Pink Pirouette marker and then colored in the center of the flower with a Pretty in Pink marker.  I cut the flowers out and carefully used mini-glue dots to put them, placing the dots on the darkest part of the flower so you couldn't see them.

I used the Hat Pins from the current Occasion Mini and some pearls to add a little of accent to the card front.  Here's a list of what I used:


Stamps: Fifth Avenue Floral, Just Believe (saying)
Inks: VersaMark IP
Markers: Pink Pirouette, Pretty in Pink
Papers: Whisper White, Pink Pirouette
Accessories: Big Shot, Perfect Polka Dot EF, Scallop Trim Border Punch, Modern Label Punch, Pretty In Pink Satin Ribbon, Pearls, Hat Pins, Dimensionals, Mini-Glue Dots

Monday, April 23, 2012

LNS Winning Pinterest Challenge Card!

This week's LNS challenge is to case a card from Pinterest.  If you have ever been on PI  you know there are some wonderful samples posted on this site, and I find I can get lost on this site for hours!  I needed a card for a bridal shower and choose to case a card made by the incredibly talented Karen Barber.  If you have a PI account you can see Karen's card HERE and you can find the link to her blog HERE.

I used the soon to be retired In-Color, Concord Crush, for this card because that is the bride-to-be color.  I stamped the flower image from Bordering on Romance 3x using a Basic Black IP on a scrap piece of Whisper White c/s.  I then just watercolored in the leaves using a Pear Pizzazz IP, and then cut out the leaves/flowers.  I then stamped the same flower image 3x on a scrap piece of Whisper White using a Black StazOn IP, and cut out just the flowers.  I do have to apologize for the way the color came out - the flowers look more blue than purple......I don't have the best lightening in my craft room.

I ran a 4" x 5-1/4" piece of Very Vanilla through my Big Shot using the Finial Press EF and then dry embossed the bottom of the card front using one of the EF from the Adorning Accents Textured Impressions EF from the soon to expire Occasions Mini.  I then added some pearls and added some Very Vanilla Satin Ribbon.  Here's the details:


Stamps: Bordering on Romance
Inks: Concord Crush, Basic Black, Black StazOn
Papers: Very Vanilla, Whisper White
Accessories: Big Shot, Finial Press EF, Adorning Accents Textured Impressions EF, Very Vanilla Satin Ribbon, Pearls, Watercolor Brush, Dimensionals, Scissors, Paper Piercing Tool

Thursday, April 19, 2012

LNS Pink, Green and Yellow Challenge

My husband's nephew and his wife had a baby girl last week, and I needed a baby card to go along with the gift I bought them.  So this week's challenge was perfect for me, and I used these colors to make a onesie baby girl card.  My idea for this card came from one that I saw on SCS, and you can view the card HERE.

I used a regular sized card and cut the sleeves 1/4" down and 1" in.  I used a 1-3/8" Circle Punch for the holes at the top and bottom and then used a Scallop Circle Punch for the accent trim.  It's very easy to punch out the accent pieces:

First you punch out a circle on a scrap piece of cardstock using the 1-3/8" circle punch:


Next you line up the circle in the scallop punch as show below:


Very simple way to make accent pieces and this idea works with a lot of our other punches as well.  I used a lot of punches for this challenge to make the flowers (Boho Blossoms Punch), eyelet trim (Eyelet Border Punch), Sleeve Trim (Scallop Trim Border Punch), 1/4" Circle Punch for the bottom snaps and I used the Bird Builder Punch for the leaves.  Added So Saffron brads in the middle of the flowers and matching ribbon. Here's the details:

Stamps: Pennant Parade (saying)
Inks: Pear Pizzazz
Papers: Whisper White, Blushing Bride, Pear Pizzazz
Accessories:  Big Shot, Perfect Polka Dot EF, So Saffron Brads and Ribbon, Punches: Word Window, Boho Blossom, 1-3/4" Scallop Circle, Eyelet Border, Scallop Trim Border, Bird Builder and 1/4" Circle Punch, Paper Piercing Tool, Scissors, Dimensionals, Mini-Glue Dots