Labels

Thursday, September 27, 2012

LNS Challenge - Paper Tearing

Happy Thursday; hope you're having a great day!  This week's LNS challenge is a fun one - paper tearing!  I thought I would create CAS cards with a masculine theme for my projects using one of my favorite sets, Serene Silhouettes.  Below are the details:


This is a really simple CAS card.  I thought about adding some baker's twine, but decided to go with brads in the corner and keep it simple.

Stamps: Serene Silhouettes, Teeny Tiny Wishes
Inks: Gumball Green, Midnight Muse, Soft Suede, Pumpkin Pie, Cajun Craze
Papers: Whisper White, Gumball Green, Midnight Muse, Soft Suede, Crumb Cake
Accessories: Night of Navy Brads, Post-it-Note Holder, 1-1/4" Circle Punch, Dimensionals, Sponge


Another CAS card, but this time I went with the baker's twine.


Stamps: Serene Silhouettes, Teeny Tiny Wishes, Itty Bitty Backgrounds
Inks: Gumball Green, Midnight Muse, Soft Suede
Papers: Whisper White, Midnight Muse, Soft Suede
Accessories: Early Espresso Baker's Twine, Neutral Button, Distressing Tool, Dimensionals, Sponge

Wednesday, September 19, 2012

Welcome to the tour de Freaks Blog Tour!


Welcome to my blog and this month's de Freaks blog tour!  The theme this month is Halloween/Fall and you just arrived from viewing LeeAnn Greff's amazing works of art!  Please click 
HERE if you want to return to back to her wonderful blog, Flowerbug's Inkspot!

The following are the projects I created for this tour and I hope you will like them!  I decided to try my hand at a three-layer card for my first project, and used one of my favorite sets, French Foliage, for this card.  The smallest two layers measure 3" x 3" and the largest layer is 4-1/8" x 4-7/8", and below is a list of what product I used.


Stamps: French Foliage, Teeny Tiny Wishes
Inks: Cajun Craze, Midnight Muse, More Mustard, Soft Suede
Papers: Very Vanilla, Cajun Craze, Midnight Muse
Accessories: Midnight Muse Ribbon, Naturals Designer Button, White Baker's Twine, Crochet Trim, Night of Navy Brads, Decorative Label Punch, Distressing Tool, Dimensionals

My next card was inspired by the amazingly talented, Connie Tumm.  Connie came up with original design for this card, and if you would like to see it, please click HERE.  I love the vintage look of this card, and the distress edges as well.  Below are the details:


Stamp Set: French Foliage, Teeny Tiny Wishes
Inks: Soft Suede, Chocolate Chip, Midnight Muse, Gumball Green
Papers: Whisper White, Soft Suede, Midnight Muse
Accessories: Word Window Punch, Chocolate Chip Ribbon, Antique Brad, Distressing Tool, Sticky Strip Tape, Sponge, Scissors, Dimensionals, Mini-Glue Dots

My hubbie and I will celebrating our 23rd anniversary on the 23th, and this is the card that I made for him.  This card also is my challenge card for this week's LNS challenge - stripes and circles!  I stamped the large leaf using Pumpkin Pie ink and then shaded in the edges with a Cajun Craze marker.  I stamped the smaller leaf with Gumball Green and shaded in the edges with a Midnight Muse marker.  After I cut them out, I pressed the ink from the VersaMark inkpad and then heat set clear embossing powder over the image.  It really gives the leaves a cool glassy look and makes the colors pop!  Below is a list of what I used:


Stamps: French Foliage, Teeny Tiny Wishes
Inks: Pumpkin Pie, Cajun Craze, Gumball Green, Midnight Muse, Soft Suede, VersaMark
Papers: Very Vanilla, Cajun Craze, Comfort Cafe DSP
Accessories: Big Shot, Stripes EF, Clear EP, Heat Gun, Word Window Punch, Midnight Muse Ribbon, Dimensionals

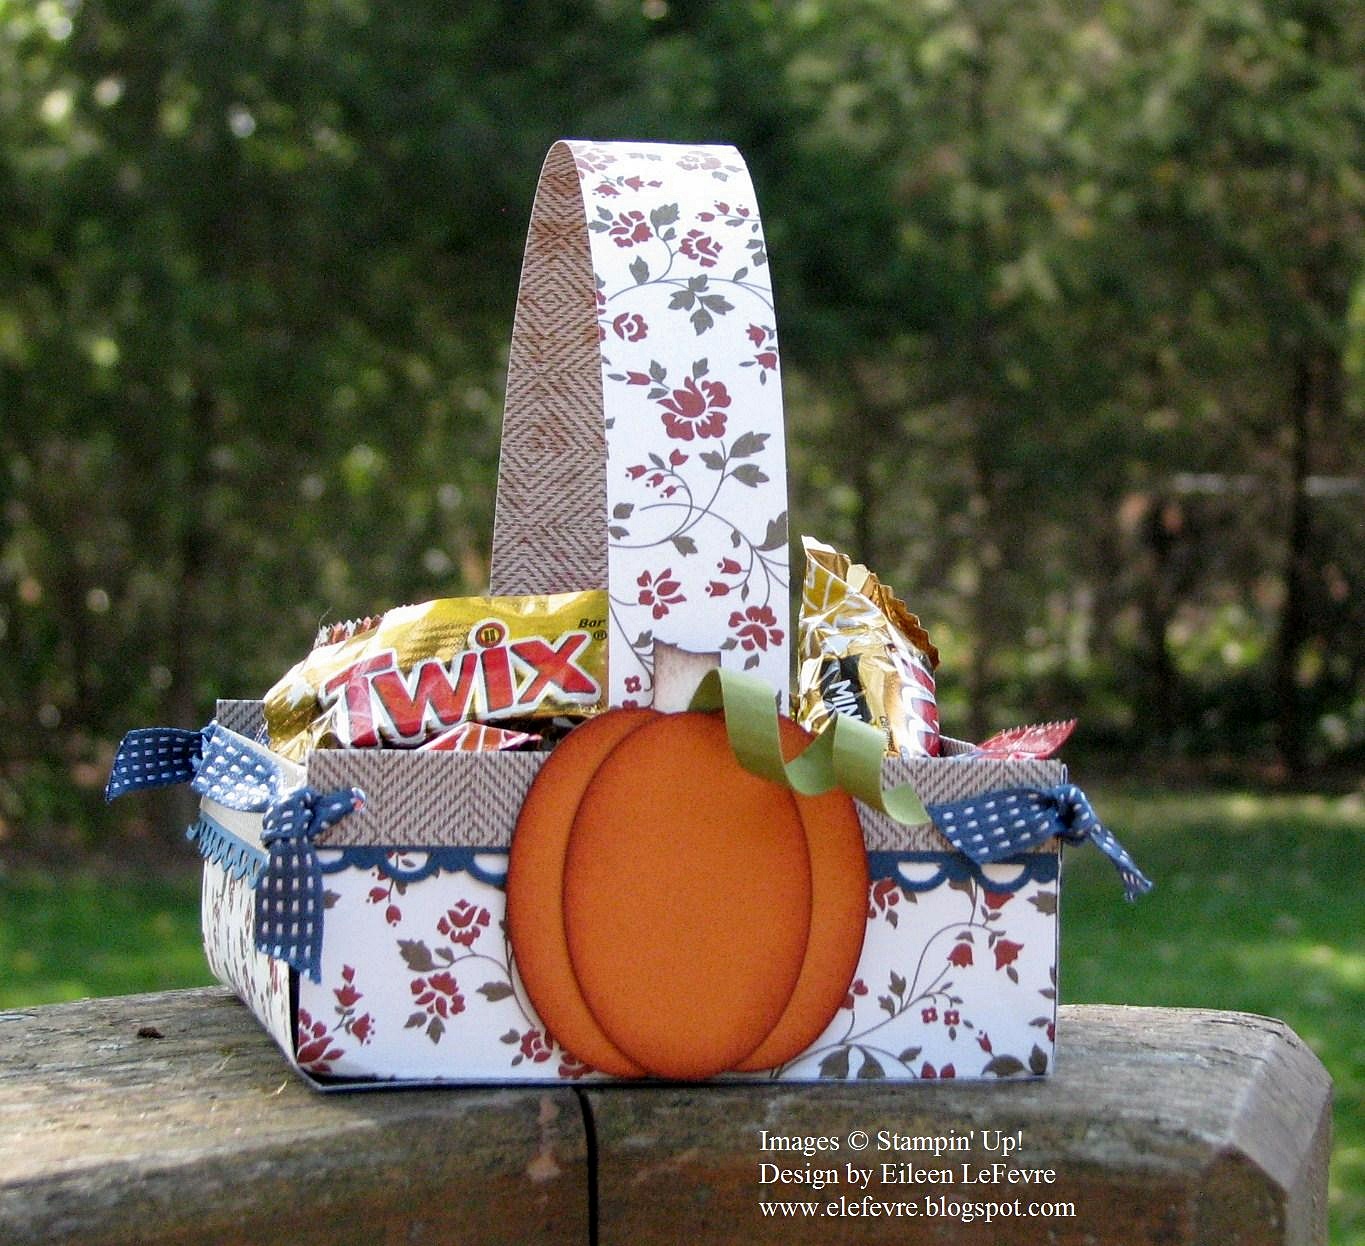
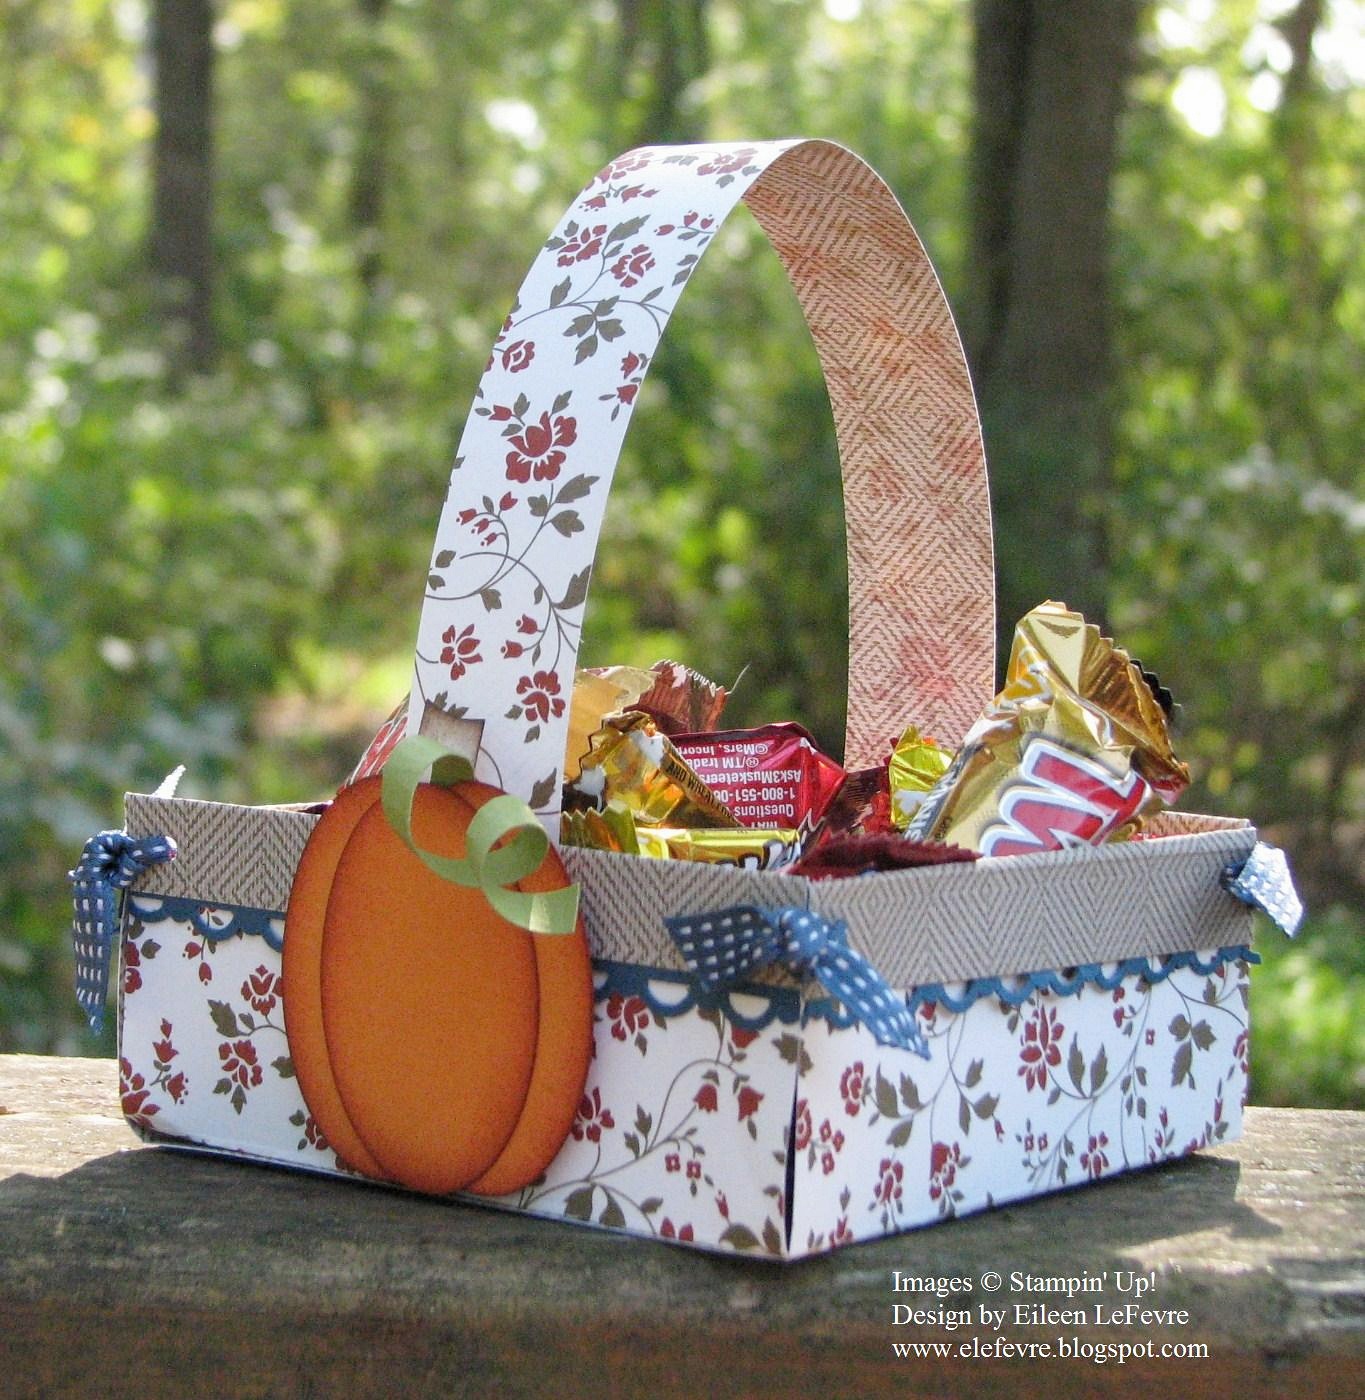
I thought it would be fun to make a small basket to hold some candy up in my office.  This basket was pretty easy to make.  I cut 2 pieces of Comfort Cafe DSP 4-1/4" x 8-1/2" and scored just the edges at 1/2" and 2".  I adhered one piece of DSP inside the other.  Next I punched holes in the upper corners and threaded some Midnight Muse through and tied a knot. The handle dimensions are 1" x 8" and I secured it on the inside with dimensionals.  I used the extra-large oval punch to punch out 3 ovals using Pumpkin Pie c/s for the pumpkin, and heavily sponged Cajun Craze on the edges.  I cut a small strip of Old Olive c/s and wound it around a small paint brush to curl the strip.  I used the window punch for the stem of the pumpkin, cut a curved edge and then sponged Soft Suede on the edges.

This is the base of a basket that I took apart to show you how to lay it out (sorry, it's a little crumpled):


And here is the finished basket:


Stamps: None
Inks: Cajun Craze, Soft Suede
Papers: Pumpkin Pie, Very Vanilla, Old Olive, Midnight Muse, Comfort Cafe DSP
Accessories: Scallop Trim Border Punch, Midnight Muse Ribbon, Hole Punch, Extra-Large Oval Punch, Sponges, Dimensionals, Simply Scored Scoring Tool

Thank you so much for stopping by and I hope you liked my projects!  
The next stop in the tour is Wendy Weixler's blog and you can click HERE to proceed there.  Wendy has created some fabulous projects for the tour that are sure to inspire!  Thanks for stopping by!

Thursday, September 13, 2012

This week's LNS Challenge is............
Challenge 190

One Layer with a WOW


This week we are getting Back to the Basics! We want you to create a ONE LAYER card (card base only) but you MUST add a technique that gives your card that extra something that you don't have since there are no layers!

The technique I used for this card is called "thumping".  Basically you ink up your image and then take a contrasting color/marker and "thump" the tip of the marker on the stamped image.  I then spritzed a little water on the image before I stamped it.  I then added some Midnight Muse Ribbon at the top of the card and there you have it - a Back to Basics card with no layers!


Stamps: Serene Silhouettes, Teeny Tiny Wishes
Paper: Whisper White
Inks: Gumball Green
Markers: Midnight Muse
Accessories: Midnight Muse Ribbon, SAMJ, Scissors, Water Bottle/Water

Sunday, September 9, 2012

Another LNS Challenge Card

I have been seeing a lot of the three layer cards on Pinterest lately and thought I would give it a try, and below is the card that I came up with.   One of these days I'll have to figure out how to use my iPad to make videos....but in the meantime, Dawn Olchefske has a great video on her blog showing how to make a three layer card, and you can find it HERE.

The dimensions to use when making this card are:

Whisper White c/s: 2" x 3-1/4", 3" x 4-1/4" and 4" x 5-1/4"
Layering c/s: 2-1/4" x 3-1/2", 3-1/4" x 4-1/2" and 5-1/2" x 8-1/2" (scored at 4-1/4")

Here is my card, and a list of the supplies I used:


Stamps: French Foliage, Teeny Tiny Wishes
Inks: Midnight Muse, Gumball Green, Soft Suede
Papers: Whisper White, Midnight Muse, Soft Suede
Accessories: Naturals Designer Button, Word Window Punch, White Baker's Twine, Dimensionals, Sponges, Scissors

Thursday, September 6, 2012

Fall Into Stamping!


LNS Challenge 189
Fall into Stamping
Time to play along with this week's LNS Challenge!  We are working on some Fall cards as that time of year is right around the corner.  Pull out your Fall sets and create a card, scrapbook page, 3D item or any other project you can think of for Fall.

Need some inspiration, click HERE.  When you get your sample created, you can upload it HERE!

Below is the card that I created for this challenge using my favorite fall colors, Pumpkin Pie, Cajun Craze and Tangerine Tango.  I got my inspiration from a card that I saw on Pinterest that Heather Telford created.  You can see all of her wonderful works of art HERE.


Stamps: Serene Silhouette, Teeny Tiny Wishes
Inks: Early Espresso, Pumpkin Pie, Cajun Craze, Tangerine Tango
Papers: Whisper White, Early Espresso
Accessories:  Big Shot, Apothecary Accents Framelits, Early Espresso Ribbon, 1/4" Circle Punch, Sponges

Thursday, August 30, 2012

LNS Color Challenge

This week we are challenging you to find your 'inner-child' and grab those blender pens, markers pens and aqua painters and start coloring. There are so many fabulous ways to add that extra bit of hand coloring to your creations so share your talents with us this week.

Watercoloring is one of my favorite techniques and below is the card that I created for this challenge:


Stamp Set: Morning Cup
Inks: Cajun Craze, Midnight Muse, Soft Suede, StazOn IP
Papers: Very Vanilla, Midnight Muse, Cajun Craze, Comfort Cafe DP
Accessories: Big Shot, Apothecary Accents Framelits, Labels Collection Framelits, Scallop Trim Border Punch, Cajun Craze Brads, Blender Pen, Paper Piercing Tool, Dimensionals, Sponge

Thursday, August 23, 2012

LNS Challenge

This week's LNS challenge was to create something with those items that you haven't used for awhile or are "saving" (which in my case, "horde) for that special projects.  Well I dusted off my Fancy Favor Bigz XL Die and created this little box using the Scentsational Season Bundle kit from the Holiday Mini.  Here's the details:

Stamps: Scentsational Season
Inks: Gumball Green, Daffodil Delight
Paper:  Whisper White, Soft Suede
Accessories:  Big Shot, Scentsational Season Die, Glitter Brad, Window Punch, Gumball Green Ribbon, Dimensionals, Brads/CAD, Fancy Favor Bigz XL Die

Friday, August 10, 2012

Control Freaks Sketch

I made the following card based on this month's Control Freak sketch (sketch is turned sideways):


And this is what I came up with:


I embossed the flower image from the set, Blooming with Kindness, using Ivory EP and then sponged Pink Pirouette and Soft Suede over the embossed image.  I added a bow at the base of the flower using Whisper White Organza Ribbon and then some pearls.  Pretty simple and easy card.  Here's the details:

Stamps: Blooming with Kindness
Papers: Whisper White, Pink Pirouette, Soft Suede
Inks: Pink Pirouette, Soft Suede
Accessories: Big Shot, Perfect Polka Dot EF, Scallop Trim Border Punch Ivory EF, Heat Gun, Pearls, Whisper White Organza Ribbon, Sponge, Dimensionals, Scissors

Thursday, August 9, 2012

LNS "Fur Baby" Challenge


I love my 2 cats, Misty and Muffin, and made a scrapbook page using Stampin' Up!'s awesome MDS for this week's LNS challenge - Animals!  Hope you can play along this week!  Here's my page:


And speaking of MDS, did you know you can try MDS2 for free!  Give it a try; click HERE


Monday, August 6, 2012

Cork Boards

I found some cork boards on clearance at Kohl's and decided to turn them into magnetic boards to hold my framelits.  First I nailed the boards to the wall, then I covered the cork with DSP using sticky strip tape.  Next I cut a magnetic sheet (found them at Staples) to the size that I wanted and covered it with DSP.  I then attached the magnetic sheet/DSP to the covered cork board using sticky strip tape.


Thursday, August 2, 2012

Display Board Case

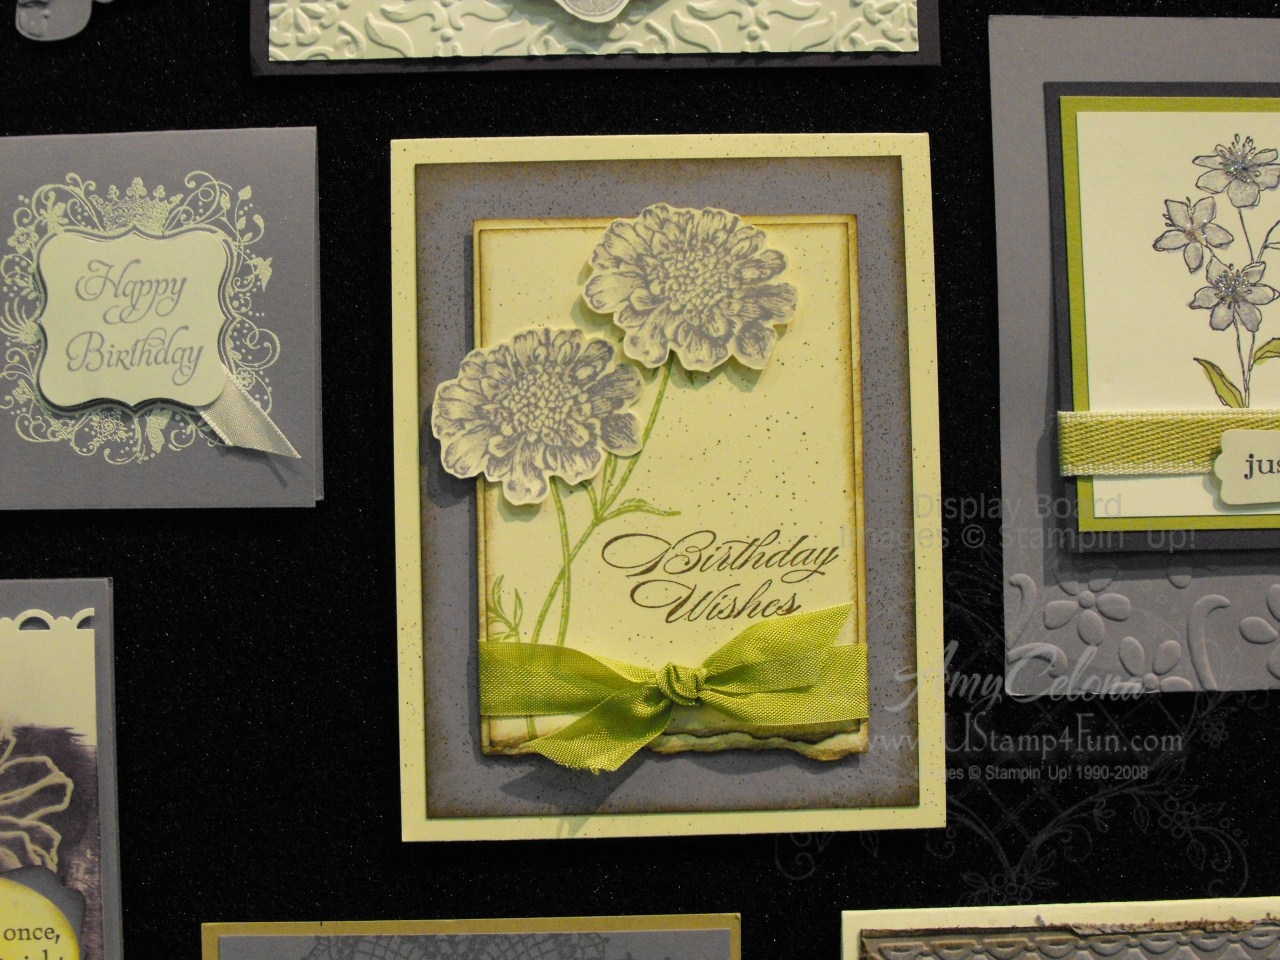
This week's LNS challenge was to case a card from one of the display boards at convention.  Since I wasn't there, I was able to find a great blog that has tons of pictures on it.  Amy Celona took hundreds of pictures and shared them on her blog: Ustamp4fun.com.

This is the card that I cased.  Since it doesn't have a watermark on it, I have no idea who's beautiful card this is.  If it's yours, please let me know so I can give you credit!


And this is the card that I made:


Stamps: Field Flowers, Just Believe (saying), Itty Bitty Background
Inks: Rich Razzleberry, Old Olive, Crumb Cake
Papers: Very Vanilla, Rich Razzleberry
Accessories: Very Vanilla Brads, Crumb Cake Seam Binding Ribbon, Paper Piercing Tool, Sponge, Scissors, Dimensionals

Thursday, July 26, 2012

Christmas in July LNS Challenge

This week's LNS challenge is to make any type of Christmas project.  For my first project, I embossed the lodge from the set, Christmas Lodge, on to a piece of Very Vanilla using Vanilla EP, a VersaMark IP and a heat gun.  I then used a sponge and rubbed Cherry Cobbler ink over the embossed image.  I wanted to use a shape other than a square for the main focal point, and decided to cut out the lodge image using one of the framelits from the Labels Collection Framelits.  I used the same framelit to cut out a piece of Cherry Cobbler c/s, and cut off the ends and layered them behind the image.  I used the new awesome SU! Paper-Piercing Pack to paper pierce just the ends.

The background image on the large piece of Very Vanilla c/s was made using the Northern Flurry Folder and I used the new Fancy Fan EF on the Cherry Cobbler strips.  Did you know that the 1" square punch is perfect to use to make the indentations on 1" strips, and the same goes for using the 1-1/4" square punch on the same size strips?  Here's the list of what I used:


Stamps: Christmas Lodge
Inks: Cherry Cobbler, VersaMark
Papers: Whisper White, Cherry Cobbler
Accessories: Big Shot, Northern Flurry EF, Fancy Fold EF, Labels Collection Framelit, 1-1/4" Square Punch, Paper-Piercing Pack, Paper Piercing Tool, Vintage Faceted Designer Button, Gumball Green Satin Ribbon, Cherry Cobbler Baker's Twine, Vanilla EP, Heat Gun, Sponge, Dimensionals, Glue Dots, Scissors, Stampin' Pierce Mat

Non-Traditional Fold Card:

I choose to do a Stair Step Fold Card and you can find the tutorial HERE on SCS.  I think this would make such a fun stamp camp project and there are so many ways you can "dress up" the folds.  For the first front fold I embossed it using the new Delicate Designs Folders, and then added a Gumball Green bow and Merry Christmas saying.  For the second fold I punched a strip of Very Vanilla c/s using the Lace Ribbon Border Punch, and then layered a piece of Gumball Green Satin Ribbon over the middle.  For the back fold I embossed a scrap piece of Very Vanilla c/s using the Delicate Designs Folder and then cut it out.  I added some Cherry Cobbler brads to add some contrast.  For the focal point of the card, I started by cutting out circle using Cherry Cobbler c/s and the 3-1/2" Circle Die.  I layered on 3" Very Vanilla circle.  I stamped 2 ornaments - one in Cherry Cobbler and the other in Gumball Green.  They were punched out using the ornament punch and the leaves that they are "hooked" on were made using the Bird Builder Punch.  Here's the rest of the details:


Front view of the card


Side views

Stamps: Delightful Decorations
Inks: Gumball Green, Cherry Cobbler
Papers: Very Vanilla, Cherry Cobbler, Gumball Green
Accessories:  Big Shot, Delicate Designs Folders, 3-1/2" Circle Die, 3" Circle Die,  Lace Ribbon Border Punch, Ornament Punch, 3/4" Circle Punch, Bird Builder Punch, Cherry Cobbler Brads, Very Vanilla Brad, Gumball Green Stitched Satin Ribbon, Cherry Cobbler Baker's Twine, White Baker's Twine, Dimensionals, Scissors

Holiday Focus - Masculine Christmas Card

Manly Christmas cards are hard to come by, and this is a great challenge that will offer up some great ideas!  For my card I used the trusty Lovely as Tree set, and like how this card turned out.  I embossed the tree onto a piece of First Edition Specialty DSP using Vanilla embossing powder, and the rubbed some Gumball Green and Cherry Cobbler ink around the image.  I took a scrap piece of Very Vanilla c/s and ran it through my Big Shot using the Square Lattice EF, and then folded it and tore the edges.  It's hard to see, but when I was finished I spritzed on some Vanilla Shimmer Smooch and love how it really gives the card a nice shimmer!


Stamps: Lovely as a Tree
Inks: Gumball Green, Cherry Cobbler
Papers: Very Vanilla, Cherry Cobbler, Gumball Green, First Edition Specialty DSP
Accessories:  Big Shot, Square Lattice EF, Houndstooth EF, Vanilla EP, Heat Gun, Cherry Cobbler Button and Baker's Twine, Very Vanilla Brads, Paper Distressing Tool, Vanilla Shimmer Smooch, Sticky Strip Tape, Dimensionals, Scissors, Sponge

Thursday, July 19, 2012

Embedded Embossing Technique

This week's LNS technique is to make a project using the embedded embossing technique.  This is a very simple and fun technique - you stamp your image of choice on cardstock, and then emboss it using an embossing folder.  Simple and fun!

I started by stamping the different leaves from the set, French Foliage, using Midnight Muse, Gumball Green and Soft Suede on a 5-1/4" x 4" piece of Whisper White c/s.  Next I ran that piece through the Big Shot using the Houndstooth EF.  Added some neutral brads, a button, Midnight Muse Ribbon (which I love), and a sentiment!


Stamps: French Foliage, Teeny Tiny Wishes
Inks: Midnight Muse, Gumball Green, Soft Suede
Papers: Whisper White, Soft Suede, Midnight Muse
Accessories: Big Shot, Houndstooth EF, Midnight Muse Satin Ribbon, Word Window Punch, Natural Designer Button, Neutral Brad, Early Espresso Baker's Twine, Paper Piercing Tool, Dimensionals, Glue Dots, Scissors

Thursday, July 12, 2012

Layers and more layers......

This week's LNS challenge is..........you guessed it - layers!  I think that adding dimension to your project, whether it's by adding a button, a butterfly, flower, etc., adds so much to a project and takes stamping to another level of creativity!  Using our embossing folders also adds an added "wow" dimension as well.

The following is what I came up with.  I almost didn't get it done yesterday as my husband, Richard, threw out his back and I ended up taking him to the ER.  We are still waiting for the pain meds to kick in and he can hardly move.  Makes me thankful that I can walk after seeing how much pain he is in just walking from one room to the next.

Not back to my card, for my base I layered Whisper White, Midnight Muse and then Whisper White.  I ran the top layer through my BS and used the new Fancy Fan EF.  I colored in the flower image from the set, Serene Silhouettes using Midnight Muse and Gumball Green markers.  The image was then cut out using the BS and the Label Collections Framelits.  I added some butterflies and rhinestones for added bling.

Thank for stopping by; have a great day - I am off to pick up another RX for the hubbie.......


Stamps: Serene Silhouettes, Teeny Tiny Wishes
Inks: Midnight Muse, Gumball Green
Papers:  Whisper White, Midnight Muse
Accessories: Big Shot, Fancy Fan EF, Beautiful Wings Embosslit, Label Collections Framelits, Bitty Banners Framelits, Gumball Green Stitched Satin Ribbon, Rhinestone Basic Jewels, Mini-Glue Dots, Dimensionals, Scissors