Labels

Friday, November 30, 2007

Birthday Card


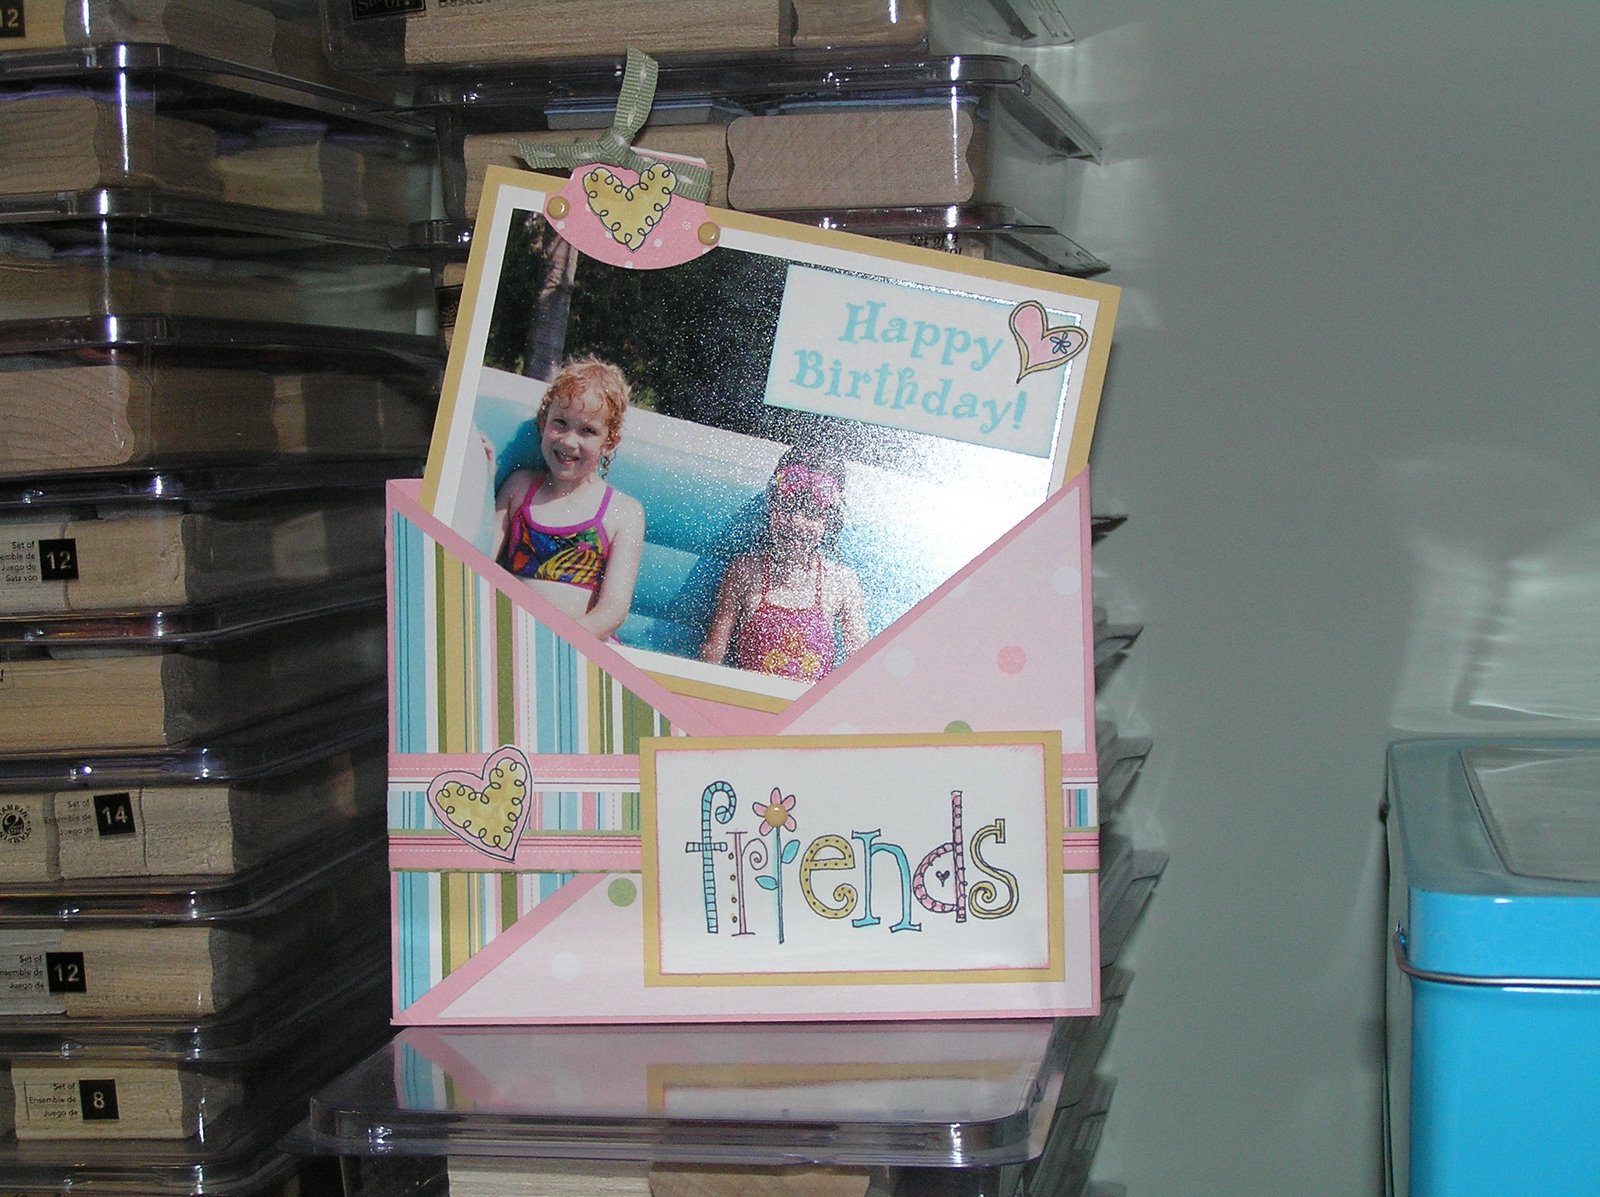
Good morning! I made this card for one of Chelsie's friends. They have known each other since they were babies and thought it would be fun to use a picture of when they were little for the background pic. I have never used this set, and this was a good excuse to "play"! Here's what I used to make it; thanks for stopping bye!

Stamps: Love Matters (retired for now - but won't it be fun if it were in the next catty?; Happy Birthday stamp
Inks: Basic Black, Cool Caribbean, Pretty in Pink, So Saffron
Cardstock: Pretty in Pink, So Saffron, Petals & Paisleys designer paper
Accessories: So Saffron brads, aqua painter, Cool Caribbean ribbon, sponge, dimensionals, scissors, sticky strip, Round Tab punch, 1/16" punch

Wednesday, November 21, 2007

Surprise in the mail


I got these 2 beautiful cards from my dear friend Kim today. One for my birthday, and one for Thanksgiving - loved the way you colored in the pumpkins on this card. Kim just recently started stamping, and has made some wonderful cards and scrapbook pages. Thanks sweetie for the birthday wishes! Have a great Thanksgiving everyone - thanks for stopping by!

Saturday, November 17, 2007

Zoofari Wax Card


I am not too sure if I am crazy about how this card turned out. I read about a technique called wax resist and wanted to give it a try. I love this set, and thought this would make a cute card to try this technique out with. The wax technique is very simple to do:

- Stamp your image in Basic Black on glossy cardstock (this technique only works on glossy and you can't use a StazOn pad).
- Color in only the areas you want white with a white or light-colored Watercolor Wonder Crayon (I didn't have white so I used Blush Blossom and it worked fine).
- Ink up a brayer and cover the entire surface of the glossy cardstock. Wipe off the excess ink on the stamped image with a tissue (I used a Q-tip because of how small the zebra's legs are).
- Add additional color to your image using a marker or watercolor it in.
- Mount on cardstock.

Here's the supplies I used:
Sets: Zoofari, Tiny Talk, Swirls background stamp
Inks: Basic Black, Not Quite Navy, Always Artichoke, Not Quite Navy marker
Papers: Glossy white cardstock, Not Quite Navy, Always Artichoke, Whisper White
Accessories: Always Artichoke Brads, Ticket Corner Punch, Green Ribbon, 1" Circle Punch

Thanks for stopping by!

Basket of Fun card


I made a quick thank you card for a friend of mine who is a Longaberger consultant. I have had this set, Basket of Fun, for a long time and have never used it - I don't know why - it's such a cute set! Sorry that the picture is a little out-of-focus; can you tell my camera is starting to die on me? I told Richard I would like a new camera for my birthday/Christmas. I just got the ticket corner punch and had to use it - I love all the new punches and all the great ways you can add depth to your projects. Thanks for stopping by - here's what I used to make this card:

Sets: Basket of Fun (retired), Sincere Salutations
Inks: Basic Black, Rose Red, Close to Cocoa, Barely Banana
Paper: Whisper White, Rose Red, Basic Black, Close to Cocoa
Accessories: Black marker, Black Gingham Ribbon, Black Brads, Dimensionals, Medium Watercolor Brush, Scissors

Sunday, November 11, 2007

Big on Christmas


I saw a design challenge on a stamping group that I apart of and thought I would give it a try! The idea was to choose a any type of project and use 2 main colors from the Dynamic Duo color combos on the SU! Color Coach. I chose to do a z-fold card and used the duo combo of Brillant Blue and Bashful Blue for my project. Thanks for stopping by! Here's what I used to make it:

Stamp Sets: Big on Christmas, Snow Burst (from the Holiday mini - which you can still order from until November 30th)
Inks: Basic Black, Brilliant Blue, Bashful Blue
Cardstock: Whisper White, Brilliant Blue, Bashful Blue, Designer Paper from SS Winter Bright kit (love this kit!!)
Accessories: Medium watercolor brush, Photo Corners Punch, Brilliant Blue brads, 1/16" punch, 1" circle punch, silver cord, scissors, dimensionals, sewing machine, white thread, Crystal Effects

Saturday, November 10, 2007

Post It Note Holder


Remember when I made these a few years ago for a craft show? These post-it-note holders made cute (and fast) gifts. I used the retired Button Bear set for this project. I put them in a cello bag and tied them with a gold ribbon. I had one person order 15 additional holders at the craft show! I used white liquid applique on the hat and puffed it out with my heat gun. Here are the dimensions for the holder: cut: 10 14/" x 3 1/2", scored: 3 1/8", 3 5/8", 6 5/8" and 7".

Gable Box


I made this gable a few years ago for one of Ben's teachers. It's a very simple and fast design. The snowman was made with a punch and used a white craft pad for the snowflakes on the real red cardstock.