Labels

Monday, December 22, 2008

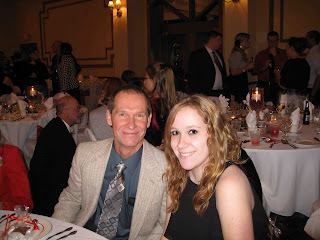
Ahhhh, the birthday boy and his sister!


Happy 13th Birthday Ben! Ben wanted to go to Panera for dinner and then we came home and had cake - Yum!!!

Sunday, December 21, 2008

"Guy" Christmas Card


I made this card to send to an old friend that I use to work with back in the 70's (showing my age here). The design is very simple and I cased it from a card I saw on SCS by Nancy Morgan. I didn't put any brads on it (but know the card would look better with them in the corners), but just kept it simple! Here's what I used:

Stamp Set: Lovely as a Tree (are you enjoying your set Collette?), Not sure what set the Christmas saying is from
Inks: Basic Black
Papers: Basic Black, Silver, Whisper White
Accessories: Black Ribbon, Snowflake CB folder, CB, Dazzling Diamonds Glitter, 2-Way Glue Pen

Birthday Card for Ben


My dear friend, Kim, made this very adorable card for Ben. I can't believe he is going to be 13 tomorrow, and I will "officially" have 2 teenagers! Thanks for stopping by - stay safe is you go out today!

Saturday, December 20, 2008

RAK from Collette


My friend, Collette, stopped over today and gave me this wonderful card. Isn't it awesome? Thanks Collette - I love your beautiful works of art!

Monday, December 8, 2008

Penguin Card


Yeah - my computer is back from the computer hospital and my cold is getting better!!! I made this card over the weekend while I had some down time. I colored in the penguin with Brocade Blue, Bashful Blue, Gable Green, Green Galore, Apricot Appeal, Pumpkin Pie, Going Gray, Bordering Blue. Thanks for stopping by! Here's the recipe:

Stamps: Warm Penguin (Whipper Snapper), Perfect Presentation (SU)
Inks: Basic Black, Brocade Blue, Bashful Blue, Gable Green, Green Galore, Apricot Appeal, Pumpkin Pie, Going Gray, Bordering Blue
Paper: Whisper White, Brocade Blue, Green Galore
Accessories: Green Ribbon, Green Galore Brads, Ticket Corner Punch, Snowflake CB Folder, Brayer, Watercolor Brush, Stampin' Dimensionals

Friday, December 5, 2008

Computer Problems

I am very bummed!!! I picked up some sort of weird virus and my computer is in the computer hospital for about a week. The good news is that I can use Chelsie's computer (when she's not around). The bad news is I can't load any of my stamping projects on to my blog!!! Please check back next week - take care - hugs/Eileen

Wednesday, December 3, 2008

Another Kitty Card


This is my card for today's sketch challenge of SCS. The image is from Whipper Snappers stamped twice. I watercolored the hat (Real Red, Wild Wasabi and Bordering Blue), and the nose (Going Gray), and then cut them out. I colored in the rest of the image and layered the nose and hat on the image.

It felt good to stamp a little today. My fever is gone, but I now have a very sore throat in it's place! Here's the details:

Stamp: Meowy Christmas by Whipper Snappers
Inks: Basic Black, Real Red, Going Gray, Wild Wasabi, Bordering Blue, Wild Wasabi, Apricot Appeal, Close to Cocoa, Pink Pirouette
Papers: Whisper White, Real Red, Retired Real Red DP
Accessories: Ticket Corner Punch, Watercolor Brush, Snowflake CB Folder, Red Ribbon, White Snowflakes, Stampin' Dimensionals, Sponge, Scissors

B-Day Card


This is a birthday card I made for Kim, Richard's niece. It's nothing fancy, but I like how the cat turned out. I painted the little guy in Creamy Caramel; which is kind-of the same color as our cat Muffin. I used some old Real Red background paper and the top note die from SU (which is an exclusive die only through Stampin' Up!). Hope you're having a great day - I going to have another cup of hot green tea with honey (I have no voice)!

Tuesday, December 2, 2008

Posts


Hi everyone - I hope you all had a wonderful Thanksgiving! Things have been very busy here; I hosted Thanksgiving for the LeFevre side of the family and then Richard's nephew got married on Saturday. I now have a really, really bad cold and am running a fever, so I am hoping to get back in the swing of card making when I feel better. For now, I wanted to post this great pic. of Richard and Chelsie from the wedding.

Saturday, November 29, 2008

Thank you Card


Richard's nephew is getting married today and I had a few minutes to make a quick thank you card today. I recently bought this cute little stamp from Whipper Snappers (thanks Collette), and created this card using it. I watercolored in the image using Riding Hood Red, Apricot Appeal, Going Grey, Wild Wasabi, and Bordering Blue. Layered with some dp and added some brads! Have a great day everyone!

Friday, November 21, 2008

Misty


I took this picture of Misty this morning. She was sitting on the edge of the tub in the sun. Chelsie thinks she looks a little creepy in this picture! For those of you that come to my stamp camps, this is our other cat that always hides upstairs whenever anyone comes over!

Thursday, November 20, 2008

SCS Sketch


I combined yesterday and today's SCS card challenge in one and designed this card. Today's challenge was how to use pearls; which I put in the middle of the flowers. I used the Tiny Spots CB embossing folder for the pocket; watercolored the images and cut them out. Here's the details; thanks for stopping by!

Stamps: Pocket Fun (retired)
Papers: Barely Banana, Cameo Coral, Chocolate Chip, Whisper White, Spring Flowers DP (retired)
Inks: Cameo Coral, Mellow Moss, Barely Banana, Close to Cocoa, Basic Black
Accessories: Stick On Pearls, Square Punches, Tiny Spots CB Embossing Folder, Big Shot, Watercolor Brush, Scissors, Vanilla Ribbon, Stampin' Dimensionals

Tuesday, November 18, 2008

Today's Color Challenge


Today's color challenge on SCS was to do a card using colors Real Red, Basic Black and Kraft. I found some very old and retired Real Red background paper that I thought worked well for the background. I stamped the image with a black StazOn pad on Whisper White cardstock and watercolored in the image. Here's the recipe:

Stamp Set: Pun Fun
Inks: Black StazOn, Real Red, Going Grey, Creamy Caramel, Wild Wasabi
Papers: Whisper White, Real Red, Kraft, Basic Black, Real Red Background Paper (retired)
Accessories: Photo Corners Punch, Black Vintage Brads, So Saffon Brad, Black Gingham Ribbon, Watercolor Brush, Stampin' Dimensionals, Sponge

Sunday, November 16, 2008


I found these pails at Target in the $1.00 section, and came up with a very simple Christmas gift for my daughter's friends.

I glued some designer paper on a 4x4 coaster, and ran them through my Big Shot using the snowflake die. I put a rhinestone brad in the middle and added some glitter on the snowflake using Dazzling Diamonds glitter and a 2-way glue pen. I used a Stampin' Dimensional to attach it to the pail.

I filled a cell-o bag with some candy and tied it at the top with a matching bow. Easy peasy!!!!

Friday, November 14, 2008

Big Shot


I am so excited!!! I got an early birthday present today - my Big Shot!!! I wanted to try to see what would happen if I ran a medium weight coaster through the BS using the Snowflake #2 die, and it worked like a charm!! Next I ran a piece of DP through the BS using the same die and then used a glue stick to adhere the DP to the coaster. Here's the finished project!

Thursday, November 13, 2008

Wooden Clip


When I was at Hobby Lobby yesterday I found some large wood clothes pins and this is what I made with one of them! Very simple and quick; I think it turned out cute! I had some star brads and cut the prongs off the back and mounted the star on the ribbon using a mini-glue dot. Here's the details:

Sets: Season of Joy
Papers: Whisper White, Ruby Red, Chocolate Chip, Old Olive, Holiday Treasure DP
Inks: Ruby Red, Old Olive
Accessories: Star Brad, Wire Cutter, Gold Brads, Red Ribbon, Dazzling Diamonds Glitter, 2-Way Glue Pen, Glue Stick, 3/4" Punch, Stampin' Dimensionals, Mini-Glue Dots, Scissors, Clothes Pin

Tuesday, November 11, 2008

Fall Card


I made this card for the Mom's In Touch Group at Ben's school. The group is going to bring treats into school next week, and I was asked if I could make cards. I used the new Autumn Vine DP papers from the Holiday Mini Catalog for the background. I love, love this paper, and know I'll be ordering more before the mini expires on January 18th!

Stamps: None; computer generated saying
Sponged on Inks: Chocolate Chip, More Mustard, Really Rust
Papers: Autumn Vine DP, Whisper White, Really Rust, Chocolate Chip, Sage Shadow
Accessories: Large and Small Oval Punches, Designer Label Punch, Vanilla Hodgepodge Hardware, 1" Double Stitched Grosgrain Chocolate Chip Ribbon, Paper Piercing Tool, Stampin' Dimensionals, Mini-Glue Dots, Sponge, Scissors

Christmas Journal


I found some jr. journals at Target the other day and thought they would make cute Christmas Journals. I took the wire off and covered the front with Baja Breeze cardstock. I punched the holes using a 1/8" hand punch and then decorated the cover. I got the idea to do a patch work effect from the awesome sample done by Cindy Lawrence (blog: http://onehappystamper.typepad.com/). I loved your card Cindy; thanks for inspiration!

To get the look of a quilt for your projects, start with a 3-3/4" x 5" piece of cardstock. Punch out an assortment of squares of designer paper using a 1-1/4" square punch. Lay out the squares first to make sure you like the quilted pattern. Adhere all of the squares (I did a row at a time)over the white cardstock with adhesive. Next, I ran it through the Big Shot using the Top Note Die. Sponged the edges with Chocolate Chip ink, and attached it to the Real Red cardstock. The last step was to run it through the Big Shot again, only this time I used the CB Snowflake Embossing Folder.

Here's the details:

Sets: Curly Label Punch Bundle
Papers: Ski Slope DP from Holiday Mini, Real Red, Chocolate Chip, Whisper White, Baja Breeze
Inks: Real Red, Baja Breeze
Accessories: Alpine Ribbon and Little Felt Flurries (both from Holiday Mini), Curly Punch, Red Rhinestone Brad, Ticket Corner Punch, Corner Rounder Punch, Big Shot, Top Note Bigz Die, CB Snowflake Folder, Stampin' Dimensionals, Scissors, Jr. Journal, Sponge

Tuesday, November 4, 2008

Jr. Legal Pad Wishlist


This week SCS (www.splitcoasters.com) starts their annual Holiday Tutorial Blitz. There are some really fun projects posted daily and I thought I would give the Jr. Legal Pad Wishlist a try. It was very easy to make and I am planning on including them in tins I am going to make for Ben's teachers. You can find the tutorial on SCS: http://www.splitcoaststampers.com/resources/tutorials/junior_legal_pad_wishlist.

Stamp Set: So Many Scallops
Inks: Baja Breeze, Real Red, Chocolate Chip
Papers: Whisper White, Ski Slope DP (from Holiday mini)
Accessories: Scallop Punch, 1 1/4" Punch, 3/4" Punch, Alpine Ribbon (Holiday Mini), Real Red Brads, Gold Cording, Rhinestone Brad, Stampin' Dimensionals

Today's Color Challenge


I decided to make a mug card for today's SCS color challenge using Winter Play. The dimensions of the card are 9" x 4 1/4", and I used a corner rounder for the bottom of the card and on the handle. I used my color coach to trace an outline on the top of the card (front side only). I put Dazzling Diamonds Glitter using a 2-Way Glue Pen. Here's the details:

Stamps: Winter Play, So Many Scallops (retired SAB)
Paper: Whisper White, Pretty in Pink, Riding Hood Red
Inks: Basic Black, Pretty in Pink, Riding Hood Red, Kiwi Kiss, Creamy Caramel, Chocolate Chip, So Saffron, Close to Cocoa
Accessories: Gold Cording, Watercolor Brush, Dazzling Diamonds Glitter, 2-Way Glue Pen, White Brads, Sponge, Paper Piercing Tool, Punches: 1 1/4" Square & Round Punches, 3/4" Round Punch, Scallop Punch, Ticket Corner & Corner Rounder Punches

Backyard Visitor


When I came home from picking up Chelsie from school (she is sick), this little guy was in our backyard. Isn't he magnificient?

Sunday, November 2, 2008

Beate's Weekend Challenge


I had some time to stamp today and thought I would do Beate's Weekend Challenge (her blog is http://beate.blogs.splitcoaststampers.com/). I pulled out a retired set called Winter Play that is still one of my favorites. I tried to make the oval look like frozen ice, but am not sure if I got the effect I was looking for! Anyway, have a great day!

Sets: Winter Play
Inks: Basic Black, Green Galore, Gable Green, Pretty in Pink, Regal Rose, Bashful Blue, Brocade Blue, Barely Banana, Close to Cocoa
Papers: Retired SS Kit Winter Play, Whisper White, Bashful Blue, SU Watercolor C/S
Accessories: Blender Pen, Pink Ribbon, Mountain Deckle Scissors, Wide Oval Punch, 2-Way Glue Pen, Dazzling Diamonds Glitter, Stampin' Dimensionals, Scissors, Sponge

Wednesday, October 29, 2008

Todays SCS Challenge


Good afternoon everyone! This is the card I made for todays SCS sketch challenge. I used a retired set called Winter Patches for this card. It's was a hostess set from the 1990 catalog and was the first hostess set I received. It's still one of my favorite sets! I stamped the mittens three times - cut out the mittens twice and layer them on the square. Here's the recipe:

Stamp Sets: Winter Patches, Snow Burst
Inks: Bashful Blue, Rose Red, Only Orange, Green Galore, Glorious Green, Summer Sun, Basic Black
Paper: Bashful Blue, Whisper White, Retire DP Paper from Winter Bright SS Kit
Accessories: Bashful Blue Brad, Watercolor Brush, Small Square Punch, Scallop Square Punch, Red Gingham Ribbon, Gold Cording, Stampin' Dimensionals, Mini-Glue Dots, Scissors

Thanksgiving Candle


I decorated a candle to put inside my pumpkin candle holder by my sink. I punched out 5 ovals using my large oval punch. I feathered the edges using a sponge and a Pumpkin Pie inkpad and adhered them together. I cut a small piece of Wild Wasabi for the stem and a small piece that I curled around a small paint brush and attached them to the back of the pumpkin using mini-glue dots. I stamped "give thanks" on Whisper White cardstock and punched it out using a small oval punch and mounted inside the matching hardware using a mini-glue dot. The designer paper I used was some retired paper I found. I layered that over Pumpkin Pie and Chocolate Chip cardstock and attached to the candle using a couple of pieces of sticky strip. Threaded some chocolate chip ribbon through the holes in the pewter hardware and tied it on the candle. Very simple and easy to do! Thanks for stopping by!

Saturday, October 25, 2008

Watercoloring with Markers


I recently saw a post on Julie Buhler's blog (http://paperpleasing.typepad.com/my_weblog/2007/10/no-copics-no-pr.html) regarding using SU markers to achieve the look of watercoloring with copic markers. I found some old watercolor paper (still can't find my SU paper!) and thought I would try this technique and use 3 different type of tools - medium watercolor brush, AquaPainter and a blender pen. I stamped the image 3 times with a black StazOn inkpad and used the following markers: Bashful Blue, Brocade Blue, Regal Rose, Real Red, Creamy Caramel, Close to Cocoa, YoYo Yellow, Barely Banana, Bashful Blue, Going Grey. The idea is to use a lighter base color and then add a darker color where you want to shade. I did this a little at a time and blended the darker color into the lighter color. It was interesting to see the different results I got from using different tools. The look is similar, but I think I like using the blender pen the best for this technique. I was able to get blend in corners better, but like the look of the sample using the AquaPainter. When I was done coloring, I dabbed some glue (2-way glue pen) on different parts of the image and sprinkled on some Dazzling Diamonds Glitter. Give it a try and let me know what you think!

Tuesday, October 21, 2008

Christmas Picture Frame


I found some unfinished wood frames at Michaels the other day and thought they would make a cute project for my upcoming stamp camp on Friday. Doesn't Ben look happy in this picture - not!! The frame was pretty easy to do, and I just love using the new Stampin' Up! Chocolate Chip Felt Ribbon! Here's what I used to make the frame:

Set: Cute & Curly
Inks: Riding Hood Red, Chocolate Chip
Papers: Whisper White, Holiday Treasures DP
Accessories: Curly Punch, Chocolate Chip Felt Ribbon, Little Felt Flurries (from Holiday Mini), White Rhinestone Brad, Stampin' Dimensionals & Mini-Glue Dots, Sanding Block, Scissors, Unfinished Picture Frame

Monday, October 20, 2008

Santa Candy Bar Wrapper


Hey stampers! I saw a very cute Santa candy bar wrapper on Dawn Griffins' blog and think they would make a fun and quick gift for Chelsie to give to her friends at Christmas. Sorry that the pictures isn't very straight; I think my batteries are low and I had a hard time taking the picture! To make the wrapper I used:

Sets: Snow Burst, Warm Words
Inks: Basic Black Marker for the eyebrows and to stamp the saying, Bashful Blue for snowflakes
Papers & Coordinating Accessories:
- Whisper White (3" x 3 1/2"; scored at 3/4" & 1 1/8")
- Riding Hood Red (hat) & Scallop Square Punch (cut in half)
- Basic Black (eyes) & Pink Piroquette (nose) & 1/4" Circle Punch
- Whisper White (beard & hat), Word Window Punch & Boho Blossoms Punch
Accessories: Stampin' Dimensionals, Mini-Glue Dots, Sticky Strip, 2-Wau Glue Pen, Dazzling Diamonds Glitter

Saturday, October 18, 2008

Christmas Candle


What do you think of this Christmas candle? I layered a 1 1/4" strip of Holiday Treasures DP over Ruby Red and Chocolate Chip cardstock. I then stamped "Merry Christmas" on vanilla c/s and punched it out with the Designer Label Punch. I placed a Stampin' Dimensional on the back and centered it on the candle. I threaded some Real Red ribbon through the Designer Holder and placed that over the saying.

Friday, October 17, 2008

Gift Card Holder


I was "surfing" Cambria's blog (http://cambriaturnbow.blogspot.com/) today and saw this adorable gift card holder and thought I would try and make one myself. They were vert easy to make! The brown ribbon on one of the cards is from the new Holiday Mini Catalog and I absolutely love it! The ribbon is made from felt, and is part of the Alpine Ribbon Originals collection.

Score a 11" x 6" piece of cardstock: On the 11" side, score at 3" on both sides and at 5 1/2". Before I folded it, I used my paper cutter to cut a slit 1/2" from each end on the 5 1/2" scored line - this is where your gift card will slide in. Then I used the edge of a punch to add a little design. Fold up the card and decorate - easy peasy!!

Thanks for stopping by!

Saturday, October 11, 2008

Decor Elements


I finally decided to put up the decor elements I purchased from Stampin' Up! I have to admit that I was a little intimidated at first to do this, but they were a breeze to put up! I can't wait to put a few more up! To see the complete line of Home Decor Elements, please visit www.stampinup.com or my Stampin' Up! website at www.elefevre.stampinup.net. Have a great weekend!

Tuesday, October 7, 2008

Happy Sweet 16 Chelsie!!


Sorry I haven't posted any projects lately.....I have been busy the past 2 days distributing the buzz book at school, and today is Chelsie's 16th birthday! I made her homemade chocolate chip pancakes for breakfast this morning. I can't believe she is 16; it just seems like yesterday she was born! I'm off to pick her and her friends up from school to take them out for lunch (end of term 1 and early release), pick up Market Day - then home to make her a chocolate birthday cake! Have a great day!

Friday, October 3, 2008

Birds


Aren't these just the coolest birds? They are called Cedar Wax Wings; they come through this time of year and are here for only a couple of days. I love watching them fly all over the yard; eating the berries on our cedar trees. There was a flock of them drinking water on the pool cover, and I was able to sneak up and take a few pictures before they flew off.

Wednesday, October 1, 2008

Birthday Card


I made a quick card for a friend of Chelsie's who 16th birthday is tomorrow. They have been friends since 1st grade; so it was very fun to make a card for her friend Alex. Chelsie's birthday is coming up - Sweet 16 on the October 7th!

Stamps: Changito Monkey Stamp; computer generated saying
Inks: Basic Black, Pink Passion, Green Galore, Creamy Caramel, Close to Cocoa
Papers: Pink Passion, Whisper White, Retired DP (sorry I don't know the name)
Accessories: Ticket Corner Punch, Large Oval Punch, Designer Label Punch, Green Galore Brads & Ribbon, Watercolor Brush, Stampin' Dimensionals, Scissors

SCS Challenge


This is a card that I made for today's SCS Sketch Challenge. I used a retired stamp set, Just Flying By; watercolored the images and then cut them out. I found an old stencil to do the half-moon. Here's the recipe:

Stamp Set: Just Flying By
Papers: Ghostly Greetings DP, Whisper White, Basic Black, Tangerine Tango, Kiwi Kiss
Inks: Basic Black, Tangerine Tango, Kiwi Kiss, Lavender Lace, Going Grey, YoYo Yellow, Blush Blossom
Accessories: Scissors, Medium Watercolor Brush, Stencil, Sponge, Stampin' Dimensionals, Mini-Glue Dots

Tuesday, September 30, 2008

Inspired by Nature Color Challenge


I had a few minutes to stamp today and thought I would give the SCS Color Challenge a try. The challenge was to make a card using the colors Baja Breeze, Chocolate Chip and Really Rust. I sponged the colors on the big flower stamp and added a light color for the grass in Baja Breeze for the background. Here's the details:

Stamps Sets: Inspired by Nature, Fresh Cuts (saying)
Inks: Baja Breeze, Chocolate Chip, Really Rust
Papers: Whisper White, Baja Breeze, Chocolate Chip
Accessories: Vintage Brads, Round Tab Punch, Chocoate Chip & Baja Breeze Ribbon, Sponge

Monday, September 29, 2008

Upsy Daisy Faux Metal Card Card


This card was made using the Faux Metal technique, and I am hoping to do use it at my upcoming stamp camp on October 24th. You start out by inking up your cardstock using a VersaMark inkpad. I then embossed Gold Glory embossing powder into the cardstock using a heat gun - I did this twice. Before I did the 3rd layer, I inked up the Upsy Daisy stamp with the VersaMark pad to have it ready to go to impress into the 3rd layer while it's still warm. It's very simple to do! Here's the recipe:

Stamps: Upsy Daisy
Inks: VersaMark
Papers: Brushed Gold, Whisper White, Retired Designer Paper
Accessories: Heat Gun, Gold Glory Embossing Powder, Large Oval Punch, Gold Ribbon, Gold Hinge & Brads, Stampin' Dimensionals

Friday, September 26, 2008

Fabulous Flowers Card


I cased this card from one I saw on SCS that was done by Aly Schilling. I stamped the flower 3 times using a Baja Breeze inkpad and cut them all out and layered them over each other using stampin' dimensionals. I placed 3 Navy Brads in the middle of the flower and tied a piece of Baja Breeze ribbon on the card. I then embossed "Happy Birthday" using a VersaMark pad and white embossing powder. It's been a long time since I pulled out my heat gun and I wasn't sure if the powder was ok to use. But it worked and the card turned out ok!

Stamps: Fabulous Flowers
Inks: Baja Breeze, VersaMark pad
Papers: Urban Garden DP, Not Quite Navy, Whisper White
Accessories: Not Quite Navy Brads, Paper Piercing Tool, Baja Breeze Ribbon, White Embossing Powder, Heat Gun, Stampin' Dimensionals, Scissors

Inspired by Nature


I was playing around with this set this evening while I was listening to the Cubs on the radio (so sad that they lost), and thought I would try the misting markers technique for this card. I used Really Rust on the top of the flower, Summer Sun for the base of the flower, and Old Olive for the leaves. I then inked up just one of the flowers and punched it out using the 1 1/4" circle punch and layered it over Summer Sun.

Stamp Sets: Inspired by Nature, Warmest Regards
Inks: Really Rust, Summer Sun, Old Olive
Papers: Old Olive, Summer Sun, Whisper White
Accessories: Circle Punches, Dark Green Ribbon, Stamp-a-ma-Jig, Water Bottle